Monday, May 26, 2008

Corn and summer squash stew - Recipe Marathon #2


I had some squash left over and I used them for the following mixed vegetable dish. It was served with rice, and sauted turkey sausage slices on top.

Corn and summer squash stew

3 small summer squashes
1 cup (after chopped) mushrooms
2-3 tbs oil
4 cups corn
1 cup tomato sauce (I used RAGU original)
1 tbs chopped fresh basil
1 tbs dill (less if dried)
salt, pepper to taste

Slice the squashes very thin, chop the mushrooms, then saute the two in the oil until softened. I used a flavoured oil that I kept from a jar of Italian antipasto of mixed mushrooms, five different kinds they were if I remember well. It definitely added to the total experience. Now add the corn, a bit of water if necessary and let it simmer a while. Finally add the tomato sauce, the fresh basil, adjust the taste (sometimes a little sugar helps, too) and let it simmer until the sauce thickens and the flavours meld.

If you don't have ready made tomato sauce at hand, you can first saute some chopped onions and garlic, and instead of the sauce then use diced tomatoes. A little extra rosemary and thyme will add to the aroma as well.

Wednesday, May 21, 2008

Squash stew for the Recipe Marathon

I love food blog cruising! It is such a delicious pursuit, almost bordering on the naughty. Why? Because I feel like a "peeping Tom", or whatever the female version of it might be called, looking into other people's kitchens, checking out what they are up to, "stealing" some of their cooking secrets. Do you see what I mean? And because I myself do not have that much time to cook, I satisfy my hunger for choice and variety by looking through food blogs for about 10-15 minutes daily, looking at the pictures, reading the recipes, almost feeling the tastes in my mouth. Sometimes I like something so much that I am compelled to find the time and prepare it.

I was cruising a bit again this morning when I chanced on this cooking challenge, the Recipe Marathon. This prompted me to try and find the time to either participate or just "parallel run". :) And if not every day, but at least doing an "off and on" marathon.

So today I ran over (it's a marathon after all) to the veggie store and got these lovely small baby squashes. I would usually make the recipe below with larger summer squashes and stuff them with the ground beef mix. But these baby ones did just as well, although I only stuffed a few, to have one per person, the rest I just chopped up.


Squash with ground beef stuffing

2-3 medium sized summer squashes (or large zucchinis, or several small ones)
1 lb ground beef
1 onion
2 tablespoon oil or butter
1 egg
2 slices multigrain bread, ground into crumbs in a blender
1 cup cooked rice
1 teaspoon sweet paprika
1 teaspoon cinnamon
1/4 teaspoon ground black pepper
salt to taste
For the sauce:
1 can basic tomato sauce or 2 cups homemade
herbs and spices to your liking

Peel the squashes and scoop out the insides. Arrange the scooped out flesh at the bottom of the pot in which you will cook the stew. If the squashes or zucchinis are too small, you can just cut them into cubes, and from the meat mixture make meatballs. Otherwise proceed the same way with the recipe.

Chop the onion finely and saute it a bit in the oil or butter. Grind the two bread slices into crumbs in a blender or food processor. In a bowl mix together the meat with the rest of the ingredients, stuff the prepared squash boats with some of it, and if there is more, form meatballs. Tightly pack these on top of the scooped out stuff, then pour water over it to just barely cover it. Bring it to boil. At this point I like to sprinkle a little chopped dill in the water and add a spoonful of chicken soup powder.

Cover the pot and let it boil for about 20 minutes. By that time the water should have reduced somewhat. Pour in the tomato sauce and add some spices, like coriander, garam masala, some chopped green chilies, chopped green parsley or coriander leaves, whatever your family likes. Now slowly simmer it until the sauce thickens. Taste it, adjust the seasonings. I usually add a little sugar at this point if the sauce tastes a bit too acidic.

Friday, May 16, 2008

Spicy chicken with corn


You may have noticed that this blog is all about speedy dishes. Today I again managed to throw together a nice - and fast! - dinner. For the main dish I made this easy chicken dish, while a pot of pasta was cooking in the background, and my older son chopped up a bowl of salad ingredients. For dessert we had the apple squares featured below, which is another fast and tasty favourite of my family.

Chicken

2 or 3 large breasts
1 onion
2 tablespoon oil
1 red pepper
1 green pepper
2-3 cups frozen corn
1 cup canned tomato sauce
2 teaspoons cumin
1/2 teaspoon allspice
1/2 teaspoon (or to taste) hot pepper

Cut the breast into small chunks, chop the vegetables. Fry the onion in the oil until it softens a bit, add the peppers and saute them together for a few minutes. Add the chicken and let the cubes fry with the veggies until all of them turn white. (I started to work on the dessert - see below - while this was going on.)

When I saw that the chicken cooked through, I added the corn and the tomato sauce, together with the spices, covered the pot and let the dish simmer until everything and everybody was ready.

For hot pepper I use hot Korean paprika, the kind they use for making kimchi. Very powerful stuff, but my family loves spicy food. I also have at home and use other heat producing substances, from ground American chili peppers to hot Thai ground chilies preserved in oil.

While the chicken was simmering away, I finished the dessert, shoved it in the oven, drained the pasta, dressed it, and finally mixed the salad with some salad dressing I keep in the fridge. We were just sitting down to the table when the squares finished baking, so I pulled the pan out, cut a few squares and set them on a large plate to cool while we had dinner. By the time we finished the main course, the squares cooled just enough so we could serve them. Some of the younger, sportier members added a little extra ice cream on top.

Apple coconut squares


Base
1/2 cup (120gr) butter
1/2 cup brown sugar
1 cup flour
grated lemon zest
pinch salt (if the butter is not salted)

Topping
2 eggs
3/4 cup sugar
1 teaspoon vanilla
1/4 cup flour
1/2 teaspoon baking powder
1 cup freshly grated coconut
2 1/4 cups thin slices of apples

Let the butter soften at room temperature for a while. Mix it well with the sugar and flour. Grate a little lemon zest into it, too. Now pat this into an appropriate sized pan (9x9 inches?) to form a thin bottom layer, and bake it for 10 minutes at 350F.

Meanwhile beat the eggs with the sugar, mix the flour with the baking powder and add to the eggs with the vanilla. Hopefully you have a helping hand around who in the meantime peeled and sliced the apples. Now mix those in also, together with the grated coconut.

When the base starts to get pink around the edges, take it out, let it cool a few minutes, then spread the apple topping evenly over it. Put the pan back in the oven and let it bake for about 20 more minutes, or until the top starts to gain a nice color.

Cool, slice, enjoy!

Friday, May 02, 2008

Well dressed veal

After a lengthy struggle with post-surgery problems (wisdom-tooth extraction with complications - see my Musingspace blog) I decided to get busy in the kitchen again.


I had a nice slab of lean veal, which I put in the freezer for a short while and then sliced it thin. I sprinkled each slice with a little pepper, then I crushed a big fat clove of garlic with half a teaspoon of salt and smeared a bit on each piece. I stacked them, covered them with plastic wrap and put them aside.

Next I chopped up half an onion finely, put it in a pan with a tablespoon of oil and let it saute slowly, stirring occasionally, while I peeled some potatoes. I grated these using the grater disk with the large holes of the food processor. When all in a bowl, I rinsed it in water, squeezed it as dry as possible and added it to the onions which tarted to turn golden here and there. First I put a lid on the pan and let it steam for a while, while I peeled and julienned a few carrots. I peeled a couple of apples, too (the green, sour variety is better then a too sweet kind), chopping them fine. When that was done, I checked the potato which was half cooked by that time. I raised the heat, added a bit more oil and fried it stirring constantly until it started to colour a bit, at which point I added salt and pepper to taste and put it aside.

Next I sauted the carrots with the apples over a tablespoon of butter (olive oil would do, too), added some salt, pepper, a teaspoonful of curry powder and a pinch of cinnamon, and kept stirring until started to go limp but was still crisp a bit. I would have liked to add some anise, too, but my husband doesn't quite like it. Nevertheless it turned out very nice and fragrant.

Now that the side dishes were ready, I kept those hot on lowest heat on the stove while I quick fried the meat slices.

I arranged the plates by spooning some of the potatoes in the middle, covering those with the meat slice, and then putting a neat pile of the carrot mix on the top. I planned to also place a sprig of parsley on the side for colour, but when I looked in the fridge I found that they were all old and yellow. Oh well...

Friday, April 04, 2008

Fish in wine sauce

I don't have too much time lately but I had to invite some friends over -- after all one cannot put dear friends off indefinitely. One must live a little every once in a while, no...? :)

Strapped as I am for time, I did not prepare an overly fancy dinner, the kinds I used to do that made me cook feverishly for two days ahead of time. I put together a nice antipasto platter for appetizer, served in the living room with crackers and soft fresh grain bread. Then for the dinner itself, we had a thick soup made with some turkey stock I had frozen down from some time earlier, a box of frozen mixed veggies that I keep in the freezer (I always buy two 2 kg bags at No Frills, cook them in a little water with a couple of soup cubes, and freeze dozens of small containers of the stuff to be used in soups, as side dishes or in potato salads), and a small batch of freshly made nockerls that I drop directly into the soup, using a handy small device.

For the main course I made the fish, for which I give you the recipe here below. And finally for desert I bought an almond danish ring from the Danish Pastry Shop on Pape Ave, refreshed it in the toaster oven to make it hot and crisp, and served it with fresh sliced strawberries and whipped cream.


Recipe

Stock
bones, head and tail of fish, skin, too, if you do not want to leave it on the filets
1 onion
1 tablespoon butter
1 cup dry white wine
1 bay leaf
5 peppercorns
1 celery stock
a few sprigs of parsley
salt to taste

Fish
1 inch ginger, grated
1 teaspoon Dijon mustard
1small sticks lemon grass, chopped fine
pinch salt

Sauce
1/2 onion, grated
2 tablespoons butter
1 1/2 tablespoons flour
1/4 cup wine
fish stock
1 teaspoon turmeric
1 reaspoon Dijon mustard
lime juice, salt pepper

For the stock, which I made earlier in the day, I chopped the onion and sauteed it in the butter on medium heat. When it started to gain colour, I added the rest of the ingredients and another liter (4 cups) of water. Counting from the time it starts to boil, simmer it on low for 20-25 minutes, removing the scum that keeps forming on the top. When done, take the pot off the heat and let it settle. If the fish was fat, you may want to remove some of that from the top. Then take a fine sieve, or use coffee filter, and sieve the liquid. Don't pour the stock, use a ladle.

For the fish I mixed together the ginger, mustard and lemon grass with a little salt, I rubbed the fish slices with the mix and put them aside.

When the stock was ready, I made the sauce. I sauted the onion in the butter, just until it became glassy looking. Then I added the flour and stirring constantly I added the wine, then enough stock to have the consistency I like (some people like it thinner, others thicker). Finally I added the spices, some lime juice, salt and pepper.

When it was time to serve the main course, I melted some butter in a pan, added the filets, and sauteed them for about 3 minutes per side, turning once, until they flaked easily.

Served it with parsley potatoes and the sauce.

Thursday, January 24, 2008

International Year of the Potato

The United Nations General Assembly declared 2008 to be the International Year of the Potato. What a silly idea, you may say, to honour such a common, lowly edible. Yet, historically speaking, potatoes are relatively new on our tables. The only corner of the world where they were known, cultivated and consumed, for some 7000 years before they became even known to us, was way up in the Andes Mountains.

The Spanish first brought some samples over to Europe sometime around 1570. But it was considered just a curiosity, studied by botanists, until good old Monsieur Antoine Parmentier, a French apothecary, started to promote it, eventually persuading the royal court to start using it. He spent several years in a German prison earlier where they fed the inmates potatoes, food which at the time was only seen fit for pigs and prisoners.

It took a while for the general population to start using it, but when they did, they did it to such an extent, that when the potato blight wiped out potato crops for a while, famine ensued. The famous Irish potato famine reduced the population of Ireland by 20 to 25 percent between 1845 and 1852.

Today we are facing a different sort of problem. There are new varieties showing up in our markets daily, so much so that sometimes we have a hard time deciding which variety should we choose.

In my childhood I ate lots of potatoes in different shape and form. During Communism this lowly tuber became a daily fare on every table. We ate it in soups, breads, side dishes, casseroles, even desserts. Then my children advised me that I should not cook it often because it "makes us fat", it is at the top of the "high glycemic food list", so I neglected it lately. Now that this year is declared to be the Year of the Potato, I will try to incorporate it more into our diet. And what better way to do that in the least obvious and visible way (so as not to draw the attention of my children) is by incorporating them into some lovely rolls. I have yet to get around to making them, but I think I am getting rather inspired by this lovely photo I found on FLICKR.

And now to an appropriate recipe from Cooks.com:


POTATO ROLLS

1/2 c. lukewarm water (105 degrees)
1 pkg. dry granulated yeast
1 c. mashed potatoes
1 1/2 c. potato water
2/3 c. sugar
1 c. shortening
1 tbsp. salt
2 well beaten eggs
8 c. sifted all-purpose flour

Allow yeast to soften in lukewarm water. Combine hot, freshly mashed potatoes (very smooth and free from lumps) with potato water, sugar, shortening and salt. The heat of the potatoes and potato water will melt the shortening. When cooled to lukewarm, add softened yeast, beaten eggs and 4 cups of the flour and mix well. Then sift in all but 1/2 cup of the remaining flour and mix until smooth. Rub the 1/2 flour into a bread cloth or board, turn dough onto the board and knead until the dough is as smooth as satin.

A bit more flour may be sprinkled on the cloth in the dough is at all sticky, but don't work in a lot more.

Round up into a ball and place in a well greased bowl. Grease top of dough well and cover with damp cloth. Keep cloth damp. Place in refrigerator.

This is enough for about 4 dozen small rolls. If you would like a dozen tonight, cut off about 1/4 of the dough before refrigerating. All this fourth to rise until double in bulk. Then roll out the dough to about an inch thick and form them into small loaves. Brush tops with melted butter, let rise until nearly double, slash the tops across, then bake in a hot oven about 20 minutes.

To make rolls later on, cut desired amount off the refrigerated dough, make into rolls and let rise until doubled. This cold dough will take longer to rise. Bake in hot oven (about 400 degrees) about 15-20 minutes.

Tuesday, January 22, 2008

Multigrain bread for breadmachine

Well, what do you know! I got myself a breadmachine at a good boxing week sale. And why on Earth, I wonder now, did I not do that sooner?! I have sooo much fun with it. But not only I. My whole family is excited about the ever changing stream of fresh breads. On the average we consume two breads in three days, and I very rarely make two of the same. I love "tweaking" the recipes. Here is the latest that the family requested to be repeated unchanged. I decided to immortalize it here for in case I still go too far astray in the future, and they want this one again.


Dump all these in the machine:
1 1/3 cups water
1 tablespoon sugar
1 1/2 teaspoon salt
1/2 teaspoon lecithin
2 tablespoons oil
2 cups unbleached white flour
1 cup whole wheat flour
1/3 cup taff flour (or buckwheat)
1/2 cup quick cooking oats
1/3 cup soaked or slightly pre-cooked millet
2-3 tablespoons wheat germ
1 1/2 teaspoons dry yeast

Bake it at Basic setting, with light or medium crust. When it beeps, you can add a handful of chopped (raw or toasted) nuts (walnuts, almonds, cashews, sunflower seeds, or a nice mix).

Friday, November 16, 2007

Torta con dulce de leche

I have discovered the new PC Dulce de Leche at Loblaws, and I decided to use it for something more interesting than just snacking on it directly from the jar, or sweeten our coffees with it. I searched around for some authentic South American recipes and I found this: Alfajor de Dulce de Leche.


Well, you must agree, it does look spectacular. But to me the dough sounded too simple, and I wasn't happy with the burned looking edges. So I decided to try another approach. I used a pancake dough that forms the basis of a traditional Hungarian dish, Csusztatott Palacsinta, or rather a variation of it of my own. For the rest I followed the Spanish recipe, using the dulce de leche and finishing it off with the whipped meringue topping. Since I don't usually have much time to spend on niceties, the topping wasn't piped on, I just smeared it on and poked peaks into it with a fork. But those peaks browned nicely, and the torte as a whole was a great success with the family, only remembering that I missed another photo opportunity after even the last crumb was gone.

But the above photo gives you a general idea, and here are my changes:

4 eggs
2 + 2 tablespoons sugar
1 teaspoon vanilla
1 1/2 cup milk
1/3 cup cake flour
4 tablespoons butter
1 jar dulce de leche
ground nuts (I use walnuts)
2 extra egg whites

First I made sure to put out the butter a while earlier to get it to room temperature.
When ready, I separated the eggs, whites in one bowl, yolks in another. I poured the milk in a blender, added the flour and ran it until it got nice and smooth.
I beat them, and when it started to stiffen I added 2 tablespoons of sugar one by one until the mass turned into a nice shiny meringue.
I just exchanged the bowls for the one with the butter, I whipped it quickly until frothy, incorporated the yolks one by one, together with the 2 tablespoons of sugar and the 1 teaspoon vanilla. I then added the milk-flour blend, mixed it together well, and then I gently folded the whites into it.

I heated a little oil in a crepe pan, spread a 1/2 inch layer of the frothy mass into a round, and fried it at medium heat until the bottom looked golden when I lifted a corner with a fork. Notice: I only cooked one side of the pancake! The top should look a bit suspiciously undercooked. Then I flipped it frothy side down onto a plate.
While the next pancake was cooking, I spread some dulce de leche on the ready one and I sprinkled a generous amount of ground nuts over it. Flip the next pancake onto this one, frothy side down.
I repeated this process until I used up all the dough.
During the last pancake I beat the extra 2 whites with 3-4 spoonfuls of sugar (to taste) and a bit of vanilla, piled it on top of the torte, and slid it in the oven under the broiler for a few minutes to get the meringue browned on the tips.

Mine was eaten still warm :P - but you can wait for it to cool. I imagine it should be good both ways, although I, too, prefer it warm.

During my search I found another interesting recipe, Torta con le Mele e Dolce de Leche. I think I will try that, too, but I will use choux pastry for it.

Monday, June 04, 2007

Pate with white wine

There were so many things going on in the family for the last half a year now that I hardly had time for even such essential activities as cooking, let alone adding to my blogs, for a long long time. But life goes on, things do tend to ease (or is it that I just got used to the new conditions...?) and every once in a while I manage to venture away from the tried and true lightning fast lunches and dinners.

One such venture was a pate I prepared half out of memory, half using ad hoc additions. Are they innovative? Probably not. After all there isn't really anything new "under the sun". But it was a relatively new taste experience for the gang, deemed worthy of keeps even by my finicky male family members. The photo I took of the crackers is - of course - out of focus, because I had exactly two minutes to take it. But I hope the recipe itself will be found inspirational enough for at least some visitors to start them on a creative path. So here it goes:

1 lb beef liver
1/2 lb chicken liver
1 chicken breast
1 onion
chicken broth cube
1/2 ts marjoram
3 hardboiled eggs
3 tbs margarine (or rendered chicken fat)
paprika, salt, pepper
2 tbs flour
2tbs oil
1/2 c white wine

I chopped up the onion into large chunks, added the sliced up beef liver, enough water to cover, and the chicken broth cube. Brought the whole thing to boil and let it simmer for half an hour. Then I added the cubed chicken breast and kept on cooking. I also cooked the eggs, let them cool and then peeled them.

When both the liver and the meat were nice and soft, I added the chicken livers and the marjoram. After this I kept an eye on the pot and cooked it just until the chicken livers were not red any more. I took the pot off the stove and let it cool to lukewarm.

The final ingredient was a roux made of the flour and oil, fried until it became light blond, at which point I took it off the heat, waited a minute, and then I slowly stirred the wine into it. It was still sputtering a bit but it quickly cooked into a not too thick paste.

Now I put everything, meats, eggs roux, into my blender (a nice big VitaMix) and blended the pate to a smooth paste, using just enough of the cooking liquid to give it a thick pancake batter consistency. (It thickens further as it cools) I adjusted the flavouring with some extra salt, pepper, and a bit of paprika. The wine was seemingly overpowering at first, while the mix was still warm, but it became very mild and pleasing as the pate aged - which it did not have too much time to do in our house, I can imagine it getting even nicer after a day or so if given the chance.

Tuesday, January 16, 2007

Maroccan meatballs


Lately the growing Indiophile trend made some headways in my kitchen, too. Canada, and I suppose all of North America, is slowly turning their attention towards the Indian subcontinent. So I have been cooking lots of curries, pulaus and pakoras. But when it comes to meatballs, I return to Mediterranian tastes.

Here are the lamb koftas we had today for dinner:

- 600 g ground lamb
- 2 onions
- 2 garlic cloves
- 1/2 teaspoon ground cumin
- 1/4 teaspoon ground coriander
- salt, pepper to taste
- 2 eggs
- olive oil
- some grated lemon zest
- 1 cup(or more) water

Chop the onion, press the garlic, and mix them well with the meat. Add the spices and the lightly beaten eggs, then form the meatballs and sprinkle some flour over them.

Heat a little olive oil in a frying pan, lightly fry the meatballs until they turn grey on the outside. Then pour the water in the pan and grate some lemon zest over them Let them cook, covered for about 20 minutes, until the balls are cooked through.

Sprinkle some chopped parsley over them and serve them with rice and toasted pine nuts.

Friday, December 22, 2006

Flapjacks...!?


The season is filled with parties and celebrations. Besides the holidays we have had two birthdays in the family this month with one more coming in mid-January. I have been cooking and baking and everything got vacuumed up by guests and family members before I even had a chance to get the camera out. So forget about pics and/or recipes for now. Except for today, when our younger one complained that "how come no dessert to go with the dinner"? And this in a family where desserts are usually served only once or twice a month. I suppose the onset of addiction to sweets is very rapid.

So... I told the wise guy to go and find a recipe that he can prepare for himself - thinking that he will abandon the idea. Wrong! After googling a bit he decided on a flapjack. He apparently was vacillating between two recipes: old fashioned and Epicurious's pancake type flapjacks , but then he still decided to go with the simpler one.

We all enjoyed his creation, it brought back memories :) for the older generation, and I promised to prepare a batch of the pancakey version soon.

Wednesday, December 13, 2006

White pea bean stew

First of all I have to apologize for the lack of imagery, but this dish also fell victim to my family's vacuum-style eating habits, not giving me a chance to snap an artful representation of it. Well, next time! Because by popular demand there definitely will be a next time. :)

Yesterday I discovered a bag of who knows how old white beans, about a pound of it. I soaked it overnight, and this morning I cooked it for a while before I had to go for my doctor's appointment. So I just took the pot off the stove and resumed after I got home.

First I thought I would make a bean salad with some other colours added. But then I decided to go for a little spin on the net, and I happened to find a recipe for a Basque White Bean Stew. Hmmm... it sounded good, but I didn't have any leeks at home. I looked around in the kitchen and I found two hafty broccoli stems, leftovers from yesterday's broccoli quiche. I figured, they should do as far as vegetable content is concerned.

Everything went well, except the beans did not soften fast enough and the family was clamouring for food. Half an hour later the beans were acceptably soft but the dish seemed still too watery. So I used bit of flour to give the sauce a bit of body. But by that time the family was too hungry and it became obvious that the amount in the pot will not be sufficient to appease their hunger. Luckily I had some lovely Basmati rice, the addition of which then completed the creation of this lovely dish.

Ingredients:
1 pound (1/2 kilo) white pea beans
3 tbs olive oil
1 onion chopped
1 medium green pepper, chopped
1 medium red pepper, chopped
2 thick broccoli stems, peeled and chopped
1 teaspoon/half cube chicken or beef soup flavouring
1 tablespoon flour
2 cups cooked rice
2 tablespoons fresh parsley, chopped
2 teaspoons dried dill weed

Soak beans. Pour off soaking water, add fresh just to cover, bring it to boil, then reduce heat and let it simmer until the beans are al dente. At this point you can pull it off the stove and wait until ready to finish it.

Chop the vegetables (onions, peppers, broccoli stems), then saute them in the oil for 5-10 minutes. Add to the beans, the flavouring, and cook the whole thing until the beans are softened.

Sprinkle the flour over, add a bit of water if necessary to create a sauce and cook it to thicken. Stir the rice into the pot, together with the parsley and dill, again adding some water if needed. Simmer a bit longer to get the flavours to mix properly. Make some final adjustments with some extra salt and pepper before serving.

Sunday, November 26, 2006

Italian cooking site with illustrated instructions

I was not well for a while but I will try and contribute to my blogs a little more from now on. I guess I must be feeling better because I agreed to have a dinner party at our house today. And it turned out really well, too! To tell the truth, I did start preparations two days ago, making sure to get everything done. I actually decided that I like this type of a schedule because it allowed me to prepare everything ahead of time, at a relatively leisurely pace.

I prepared a European style dinner and in the process of looking for ideas I found another good site with step-by-step illustrated instructions. It is the site of this lady in the picture, Anna Maria Volpi, born in Italy, now living in California. Her site, Anna Maria’s Open Kitchen is chock full of great Italian recipes (and I don't mean spaghetti and meatballs) with lots of guidance to help you get great results.

Friday, November 24, 2006

Roley


7 eggs
3/4 cup (170 grams) sugar
1 teaspoon vanilla
1 teaspoon baking powder
1/3 cup (70 grams) finely ground regular breadcrumbs or graham crumbs
1 cup (200 grams) ground walnuts
1 tablespoon rum

1 box butterscotch pudding (the size that requires 2 cups of milk)
2 egg yolks
1 cup (250 grams) margarine or butter
3/4 cup (150 grams) icing sugar

1 box ladyfingers (dry ones, the kind they use for Tiramisu)
1/2 cup milk
1/2 teaspoon instant coffee
1 tablespoon rum
1 box (250 ml) whipping cream
sour cherry jam

Beat egg yolks with sugar until frothy and lemon coloured. Beat in vanilla and baking powder. Fold in the breadcrumbs, walnuts, the beaten whites of the 7 eggs, and 1 tablespoon of rum.

Spread it in a baking pan and bake it for about 20-25 minutes, or until it feels springy to the touch.

Prepare the butterscotch pudding as per the instructions on the box. Beat in the 2 egg yolks while it is still hot and let it cool. Then beat the margarine (butter) with the icing sugar until fluffy and slowly beat in the cold pudding. Spread half of it over the baked cake bottom, then mix together the warm milk, coffee and rum, dip the ladyfingers into it and put rows over the cream, spacing the rows about one inch apart. Spread the second half of the cream on top.

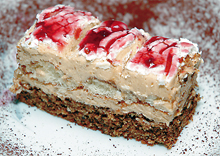
Now whip the cream, sweeten it to taste with some icing sugar, and spread it on top of the cake. Then beat a little sour cherry jam, adding a little water if necessary to get it to drizzling consistency. Drizzle some of it over the cake in a decorative fashion. Let it sit for a while before cutting it into squares or rectangular slices.

Monday, November 13, 2006

Bus journey blogging and more...


I discovered this blog, Route79: Reflections on a bus journey home, while I was looking for some recipe or another. The blogger (Jag) is a Londoner who travels to and from work (Genie/O2 Mobile Internet Service) every day on the (you guessed it) Route79 bus. It contains his daily musings and impressions, with lots of pictures that exhibit great artistic sense. He has several other websites, some of them very technical, like the one on Mobile Streaming Videos. But, most importantly, he also has a great recipe collection, complete with photo instructions to aid you with the preparation process. I should not forget to mention that the recipes are all of a good East Indian home cooking type, asking for lots of lovely spices.

Thursday, October 19, 2006

Indian cooking site with illustrated instructions

Although I must admit with embarrassment that I was not able to give credit to the original poster for the recipe below because I have no idea where did I see it, I did give it a try to find it again. I was not successful, but in the process I discovered a wonderful site where the recipes are accompanied with detailed photo instructions. It is called Spice India Online, and if you did not visit it before, make sure you do so now. :)

Red lentil dish


I just discovered a particularly flavourful dhal recipe. It was so successful with the family that I immediately had to repeat it, and was made to promise that I will not loose this recipe (something I often do...). The masala mix is very nicely balanced, with just the right amount of "bite". Even my East European octogenarian mom-in-law likes it (!). So I encourage you to give it a try and let me know how did your family react to the experience.

Ingredients:

2 teaspoons black mustard seeds
1 teaspoon fenugreek
1 teaspoon coriander seeds
1 teaspoon cumin seeds
6 whole cloves
4 cardamom pods
1 teaspoon chili powder
1/4 teaspoon cinnamon
1 onion
3 tablespoon oil
1 tablespoon ginger
4 garlic cloves
1 teaspoon salt
2 tablespoons tomato paste
1 cup red lentils
5 plum tomatoes (canned OK)
juice of 1 lime
handful chopped coriander or parsley

Put the first six of the spices in a pan and dry roast them until they start darkening, mustard seeds start popping, and you can smell their lovely roasted aroma. Then pulverize them in a spice grinder, or with a mortar and pestle, adding to it the chili powder and cinnamon, too.

Chop the onion, saute it in oil until it softens, add the ginger, press in the garlic and saute a few minutes more. The add the spice mix with the salt and stir this for about 5 minutes.

Now slowly add 4 cups of water, scraping the bottom to deglaze the pot, add the tomato paste and dump in the washed lentils. Simmer for until almost ready, about 20 minutes (mine was ready sooner!).

Dice the plum tomatoes, add them to the pot, squeeze in the lime juice, add the coriander/parsley and add some more water if you like it thinner. Finish cooking it to the desired doneness.

I served it with cashew rice, yoghurt and mango chutney.

The final dish has a dark chocolatey hue from the roasted spices. Although my older son (a serious calorie counter) was pleased with the relatively low calorie count, but becried the fact that he couldn't stop himself from having seconds...

Sunday, October 08, 2006

Miss Carrie's cookbook


Caroline Watkins lived in Lawson, Missouri, in the second half of the 1800s. Her handwritten recipe collection was found in a dusty old trunk in the attic. Now it is in the library of William Jewell College in Liberty, Missouri.

It is fun to leaf through it online. You can see the actual pages, but they are typed out, too. There are also biographical notes, photos of her and her kitchen. I had a good time visiting the site. :)

Thursday, October 05, 2006

VideoJug - learn to do anything by watching it on video

What a great discovery! I for sure will be a faithful visitor there. :)))
VideoJug is a UK website for sharing how-to information and knowledge by using video instructions. Anybody can post. Of course it is moderated, no X rated stuff allowed. Instead you can see instruction on how to do things around the house and garden, care for your pet, how to make drinks, and a long list of recipes, from the simple to the elaborate. Great!

It is based on the concept of YouTube, except here every video has to be useful, instructional. They also explain how to prepare and upload your video, should you find skill you have a burning desire to share.